
Heart Centerpiece - A Free Wool Felt Sewing Project
/
The cozy days of winter are here - hot tea and new sewing projects. Hmm. Wisteria and wine! With Valentine's Day around the corner, I put together this tutorial to make a simple wool felt centerpiece with appliqued hearts. Just about 8" square overall, the center is ideal for a votive candle, candy dish (that would be my choice!), bouquet of baby's breath or small jewelry box on your dresser after the holiday has passed. How love-ly.
This is a perfect project for beginners. It stitches up in an afternoon and provides great practice for the blanket stitch.
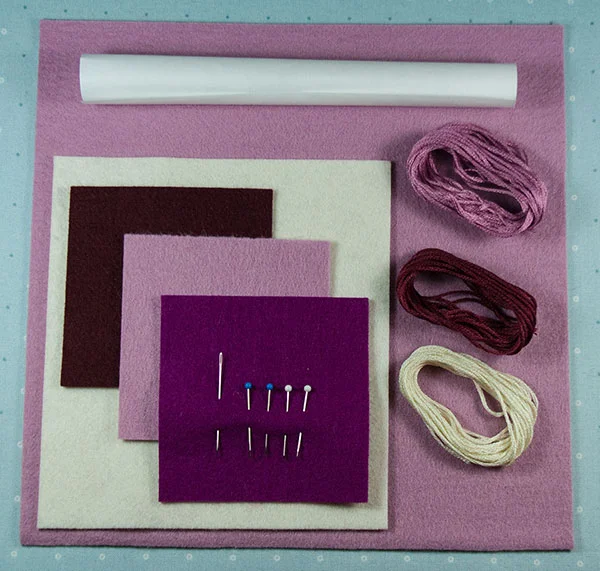
MATERIALS and TOOLS
Felt - I recommend using pure wool or wool blend felt.
• background and backing - two 7 7/8" x 7 7/8" squares (actual size) (Color A/wisteria)
• large hearts - 5" x 5 1/2" (Color B/soft white)
• small inside hearts - 3" x 3" (Color A/wisteria)
• small single hearts - 3" x 3" (Color C/wine)
Embroidery Floss - Coordinating and/or accent colors as desired
Freezer Paper - 6" x 9" (For using the Freezer Paper Method to cut perfect heart shapes out of felt)
Tools - an iron for the Freezer Paper method, sharp scissors, embroidery needle, pins, ruler and a pencil
PROJECT NOTES
• I used 1mm thick Holland wool felt and coordinated my floss to the felt color.
• The blanket stitch is used throughout this project.
• I used a size 7 embroidery needle threaded with two strands of floss knotted at one end. For the blanket stitch, as a general rule, cut your floss length approximately 4 times the distance you are stitching. I have provided the lengths for you in parentheses after each step's headline; they are more than adequate.
• If you are completely new to sewing with wool felt, you may find my free Beginner's Guide to Blanket Stitch helpful.
STEP 1 - CUT EVERYTHING OUT
Using the PDF Pattern Template, cut your background and backing squares and heart shapes. You will have four large hearts and eight small ones. You should not need freezer paper to cut the background and backing squares; straight edges are much easier to cut from felt than shapes. If you don't have Freezer Paper, simply cut out the pattern pieces from the template, pin them to your felt and cut out along the edge. Seam allowances for your edge stitching are included in the pattern template.
STEP 2 - APPLIQUE THE INNER HEARTS (25")
Position an inner heart on top of a large heart 3/4" from the bottom point and with the center "Vs" aligned. Pin to hold in place and stitch all the way around, securing the small inner heart to the large. Knot and snip your thread on the back. Repeat for all four inner hearts.

STEP 3 - APPLIQUE THE LARGE HEARTS (50")
Position a large heart in one corner of your background, 3/4" from the corner point and the "V" aligned with the diagonal of your background square. Pin in place. Stitch all the way around, joining the heart to your background. Knot and snip your thread on the back. Repeat for all four hearts.

TIP - A great way to line up your hearts is to lay a straight edge (a ruler or piece of paper) from point to point across your square background.

STEP 4 - STITCH THE SINGLE HEARTS (25")
Position each of the single hearts along the sides in between the large hearts with the bottom point 1/2" from the edge. Applique them to your background. Knot and snip your thread on the back after each one.

STEP 5 - STITCH BACKGROUND TO BACKING (140" total)
Lay your appliqued background on top of your backing square. Make sure all of your edges and points are even and pin to hold in place. Stitch all the way around. Lesson 2 in my tutorial series will show you how to stop and resume with a new length of floss when you're about to run out. You would need a really long piece to make it in one trip :)
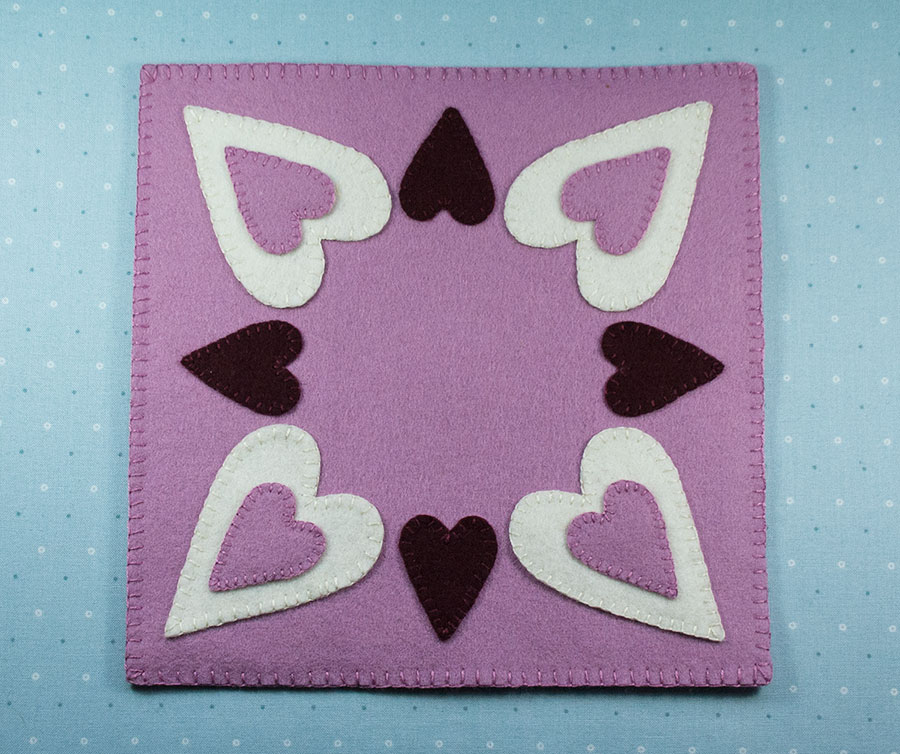
Beautiful! Now go find a small vase of baby's breath, a dish of candy or votive candle to put in the center and admire your work!
Happy Sewing!
