
How To Sew Wool Felt - Blanket Stitch - Beginner Lesson 4
/
Welcome!
Before you begin, we recommend:
Sewing With Wool Felt - A Beginner's Guide To Blanket Stitch
How To Cut Perfect Shapes Out Of Wool Felt - A Tutorial
How To Appliqué Wool Felt - Blanket Stitch - Beginner Lessons 1, 2 & 3
In this lesson you will learn:
How to sew two pieces of felt together using the blanket stitch. We will cover two different scenarios:
Option A - Going All The Way Around
Option B - Stitch Just One Edge
Let's get started!
Supplies Needed
Pattern - for a shape for Option A
Wool Felt - for your shapes for Option A
Wool Felt - cut into a rectangle for Option B
Embroidery Floss or Perle Cotton
Embroidery Needle, Scissors and PIns (Scotch Tape optional)
Freezer Paper and a Pencil

Option A - Going All The Way Around
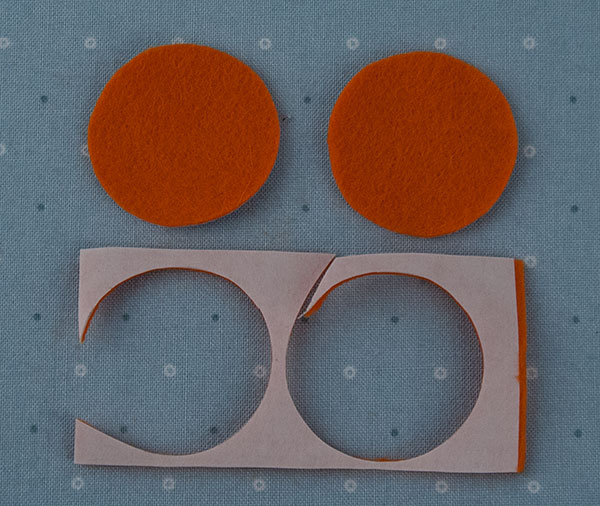
Step 1 - Cut Your Shapes & Thread Your Needle
Cut two identical shapes of wool felt to sew together. I am using a circle but you can use anything. The first MOST IMPORTANT element of sewing two pieces of felt together is that the shapes need to be as identical as possible. Careful tracing of your pattern and cutting of the felt after your freezer paper has been ironed to it will result in the best possible scenario. Don't forget to peel your paper away.
Thread your needle and get ready to stitch.
Step 2 - The First Stitch
Sewing around two shapes of wool felt to join them together is very similar to appliquéing all the way around a single shape when attaching it to a background fabric.
The are two fundamental differences between the two:
You will see the back of your work.
C is the SAME point as B, except on your back piece of fabric.
Because you will see the back of your work, you want to do to things:
Hide your knots.
Make the stitches on the back look the same as those on the front.
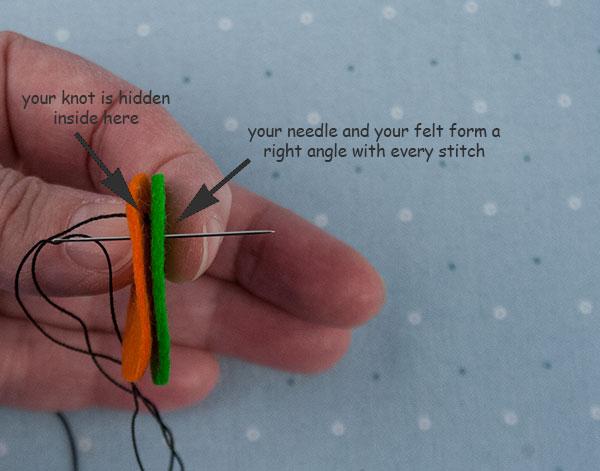
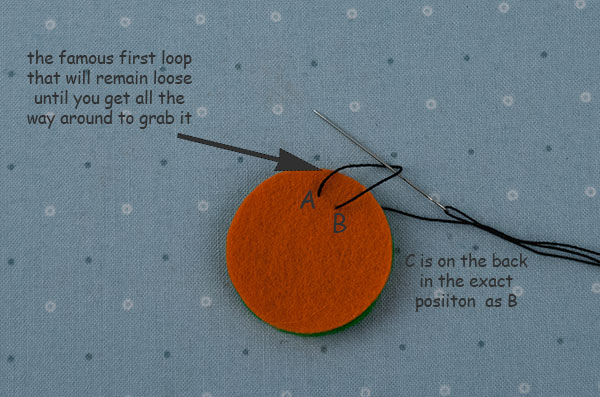
Start with just your front piece. Come up at A (from the back) where you want your first stitch to be. Remember this stitch defines the distance from your edge for all stitches. Choose it wisely :)
Pull your thread all the way through until your knot is against the back side.

Position your back shape behind the front, making sure all of the edges are even. Your knot is hidden between the two pieces - yay! Can't see the knot. So far so good.
Insert your needle at B, going all the way through both pieces and coming out the back at C. This is where the second MOST IMPORTANT element to success is. You want to send your needle through the felt at a right angle to it. This way, the needle point, or B/C, will be the same distance from the edge (and the previous stitch) on the front as it will on the back - and your stitches will look gloriously even on both sides!
When you pull your thread through, you have a loop just as in appliqué, except rather than lying on your background fabric, it is suspended in mid air. Bring your needle up underneath it, back to front, and pull it all the way through. This is your famous, loose first stitch! Don't pull it too tightly.
Your stitches should look the same on both sides of your work. If they don't, it means that you are not sending your needle through both pieces of felt at a right angle or your edges are not even. Felt is very forgiving. Reposition your shapes' togetherness as you need to.
NOTE: We are hand cutting our shapes and hand sewing them together. We are human and this is what hand made is all about. It will not look like a machine stitched these two pieces of felt together. Keep that in mind as you enjoy this :)
Here is what your front, back and edges should resemble as you go around your shape. My front circle is orange and the back is green. Yes, it was orange when I cut it out. The "framing" thread that I spoke about in previous lessons lies between your front and back, right along the edge.

Step 3 - The Finish Line
Stitch all the way around and gauge your finish. After your last stitch, loop your needle under the first stitch you left behind, keeping your framing thread behind it.

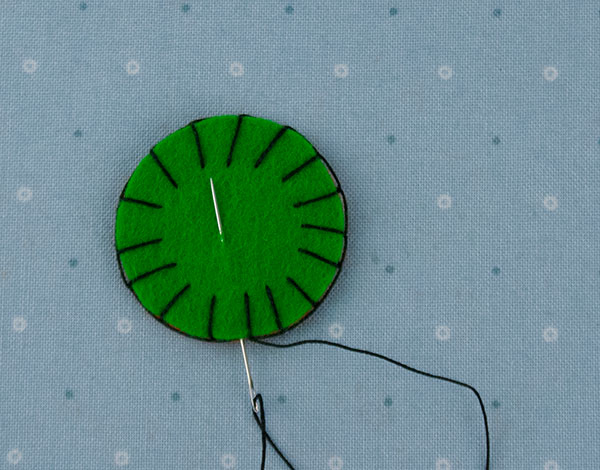
Pull it all the way through, away from your work, creating a completed, snug stitch on your front piece. Now turn your work over. You will see that you need to complete this last stitch on the back. Insert your needle through your back piece, at where C would be relative to the front, CAREFUL not to come through your front felt. Bring your needle up between your front and back.

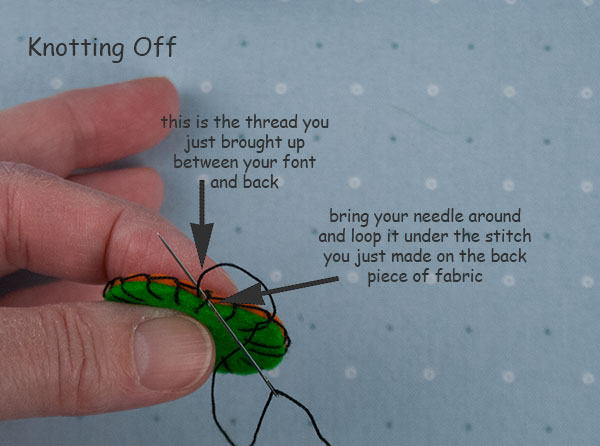
Step 4 - Knotting Off
Working from the edge of your felt pieces, bring your needle around the loop under the stitch you just created. Pull snug but not tight.
Loop it around again and make a small knot by putting your needle through the small loop (the second one you just made) and pulling it through. Feed your needle between your front and back toward the center. Weave it slightly within the thickness of your felt, careful not to have any stitches show.
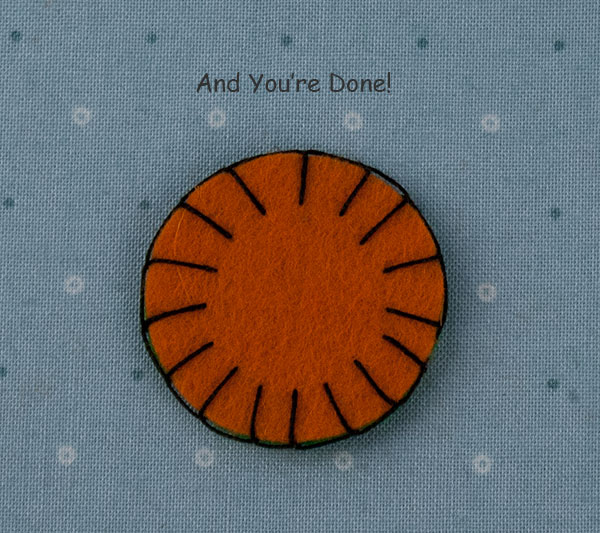
Emerge your needle and pull all the way, tucking your knot just a bit inside the edge but not pulling your framing thread inside. It's okay to see your knot. It's tiny. Clip your thread.
What's Next?
Now we'll visit Option B to learn what to do when you're joining two pieces of felt but not going all the way around.
Option B - Stitch Just One Edge
Step 1 - Prepare Your Project
You will need a rectangular piece of felt for this part of this lesson. Cut one, fold it over, pin it in place. Thread and knot your needle.
Step 2 - The First Stitch
There is no A for the first stitch. Bring your needle from the INSIDE OUT between the two pieces of felt, coming out at B on the front side. This point B will define your stitch placement from the edge so be sure to get it where you want it! Pull until your knot catches on the inside. Go around to the back of your work and insert your needle from the OUTSIDE IN, at point C. Point C should match up to point B when you close the two pieces.

Pull your thread toward the outside edge, all the way through, tightening your two pieces together. Make sure your framing thread is on the outside edge, or in this case, to the left.
Insert your needle under this stitch on the front side and pull it outward, away from your work, looping it around and securing the first stitch.

Step 3 - Continue Stitching
Put your needle in at B for your next stitch, coming out in the back at C. Your framing thread loop is in mid air. Make sure your needle is in front of it before you pull your stitch snug. Continue stitching all the way along your edge until you approach the finish line..

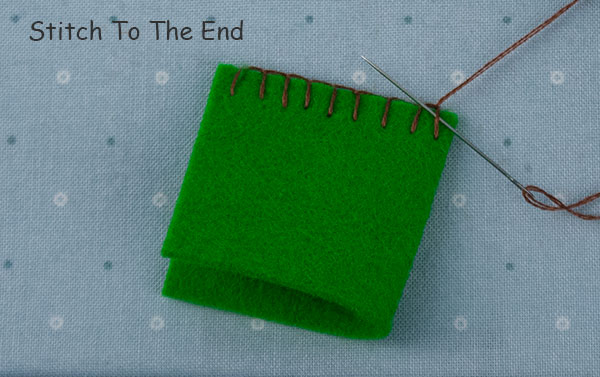
Step 4 - The Finish Line
I like to have my last stitch approximately 1/8" from the folded edge. Complete the last stitch as if you were going to dip down at B again. Instead of dipping, bring your needle up inside the last stitch you took and loop it around your framing thread on the edge.
Then loop it around a second time, putting your needle back through this second loop to form a knot. Weave your thread through the thickness of your felt toward the middle, pulling gently to tuck your knot and clip your thread.

Step 5 - Repeat
Repeat this process on the other side and you're done!