
How to Make a Wool Felt Star Ornament - Free Sewing Tutorial - Points and Inside Corners
/I love felt stars, especially pointy ones, and I love sewing wool felt with the blanket stitch. I must admit; however, stitching points is not my favorite part of creating a holiday ornament.
The more I make, though, the better I get :)
I'm going to show you how to stitch the points and inner corners of a star when using the blanket stitch to join pieces together. This DIY hand-sewing tutorial is suitable for all skill levels and perfect for the beginner learning to work with felt. I highly recommend using pure wool felt for this project because it won't tear when you stitch the point.
***I've started a Pinterest Board called "Wool Felt Stars" to provide some creative inspiration. You may choose to embellish either side of the star before or after assembly. I left my sample plain for this lesson.
Related Tutorials for this Project on my BLOG
How to Cut Perfect Shapes Out of Wool Felt
Wool Felt Lesson Series
Materials & Tools You Will Need
• pattern template - get it here
• wool felt - 4 1/2" x 7"
• freezer paper - 4 1/2" x 7"
• stuffing
• embroidery floss
• embroidery needle, a pin, sharp scissors and a pencil
• iron (used for the freezer paper method of cutting your felt pieces
Project Notes
• The pattern template is exact size and includes a 1/8" seam allowance for your stitching.
• I used 1mm thick pure wool felt for my sample and stitched with a size 7 embroidery needle. It is threaded with two strands of floss knotted at one end.
• You will notice in the photos that my needle is slightly curved; they tend to bend with countless hours of use!
• As you may already be aware, from my patterns and tutorials, even though I know how to stop and start (and have written a "how to" lesson on this subject), I don't like to run out of thread when stitching around the outside of a project. For this star, my thread is approximately 60" long, each of the two strands that is.
• I never pinned my star front and back together but feel free to do so.
• You always want to make sure your edges are even while you work. This will ensure uniform stitching on the back and front. My stitches are approximately 1/8" from the edge of the star.
Let's get started! (no pun intended :) )
STEP 1 - Cut Out Your Stars
Using the freezer paper method and pattern template, cut out two stars. When you trace your pattern template onto the freezer paper, mark the top of the star and don't remove your paper right away.
STEP 2 - The Inside Corner
• Remove the freezer paper from your two star pieces and lay one on top of the other, matching the top points.
• Begin stitching along the side of the top point toward the first inside corner.
• The stitch made just before the actual corner should be taken as if there is no corner - just pretend you are going straight.
• Take the actual corner stitch, pointing it toward the center of your star.
• Continue along the next straight edge toward your first point.
• Take your last stitch just before you get to the actual point.
STEP 3 - The Point!!!
To make the point stitch, insert your needle into the previous stitch, coming out on the back through the same hole.
Before you pull this point stitch taught, bring your needle forward from the back just inside the point, catching just a tiny bit of both pieces of felt. This little "catch" is going to hold your point stitch in place so it won't slide to one side or the other!
Now pull your thread all the way through, framing the left edge of the point.

For the next stitch, I like to hold my point stitch thread out away from my work. To make the stitch on the right side of the point, insert your needle into the previous stitch hole for the third time, emerging at the back. Keep a little tension on the point stitch thread as you pull this right side stitch snug.
And voila! What a beautiful point! And your stitch won't slide off to one side because it is secured at the edge.
STEP 4 - Stuffing
Continue stitching until you get around the last inside corner. Using very tiny bits at a time, stuff your star. I don't stuff star ornaments too firmly along the edge because I like my stitching to lie flat rather than be pushed open.
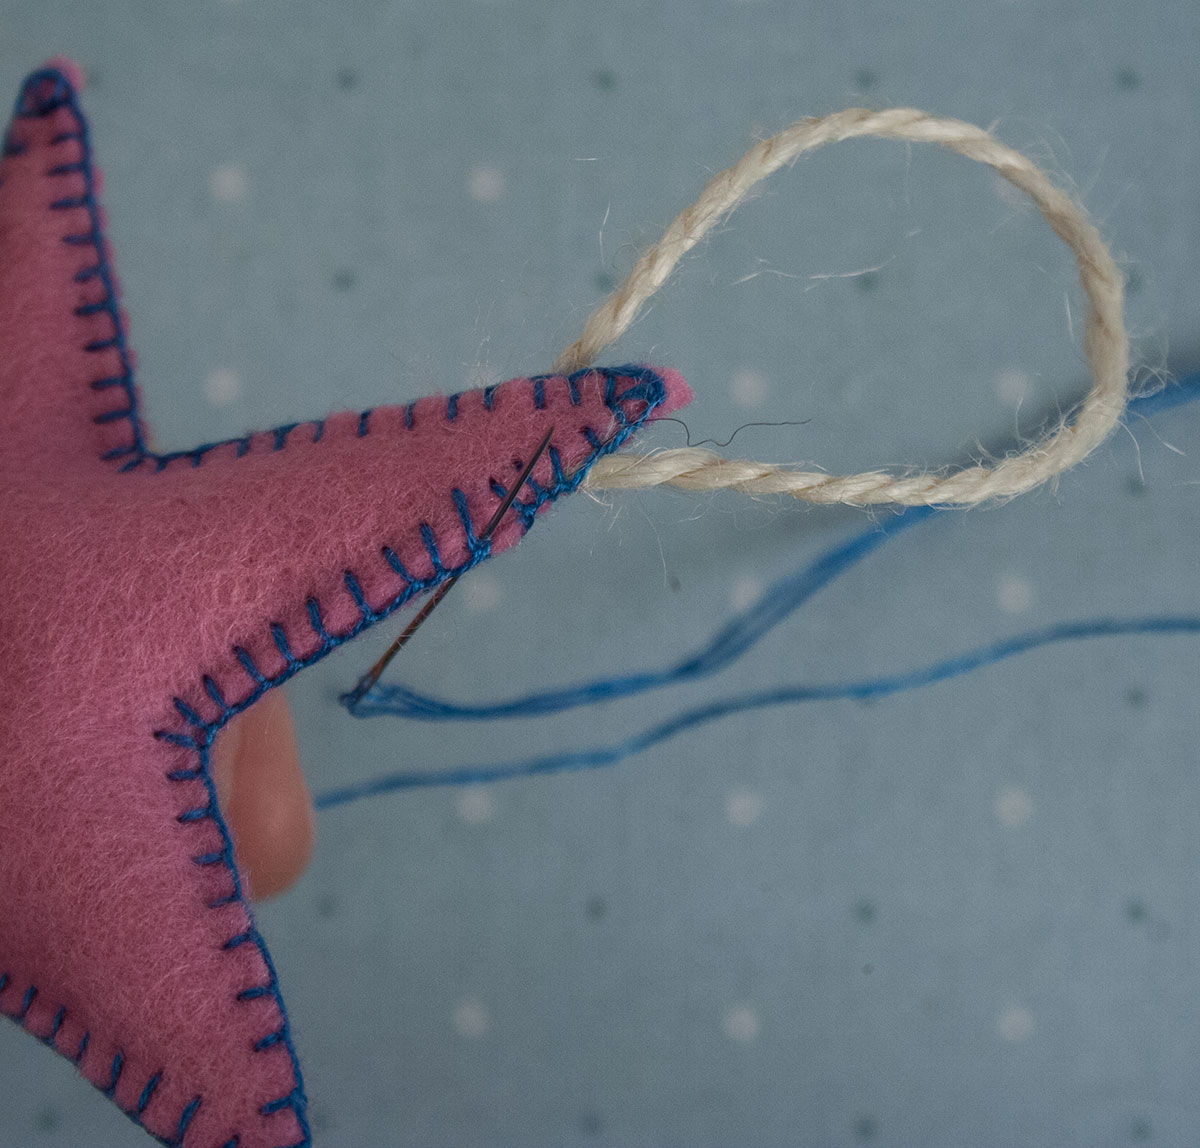
STEP 5 - The Hanger
Cut a piece of jute twine about 4" long. Put a small square knot at the bottom and tuck this end inside the top point of your star. The hanger will come out from each side of the point.
STEP 6 - Finishing
• Continue closing the top point, stitching around the jute as you go. Add a little bit of stuffing at the end if the top point feels too flat. Make sure the jute emerges on each side the same distance from the top point.
• After you take your last stitch, bring your needle up through the outside edge of your first stitch and make a tiny knot. This will join your "framing thread" from the last stitch to the first.
Insert your needle in between your front and back star pieces right where you made your little knot. Emerge within the star body and give a little pull, tucking your knot inside.
Push against the felt a bit where your thread comes out and snip your thread. When you release, the thread will retract inside and be gone!

Congratulations!
You now have a beautiful felt star ornament. Be sure to visit my Pinterest Board for ideas on how to embellish star ornaments before and after stitching them together. A button, simple embroidery - even just a few French knots here and there are lovely.
I hope you enjoyed this lesson. Please let me know if any additional steps or notes would be helpful. Writing tutorials allows me to share the fun and hone my pattern-making skills. Feedback is always welcome.
Happy stitching,
Annette
